Introduction to Repairing Tears and Leaks
Whether you’re dealing with a torn wetsuit, a leaky pool liner, or damaged outdoor gear, knowing how to properly repair tears and leaks can save you significant money and extend the life of your equipment. These repairs might seem intimidating at first, but with the right approach and materials, most damage can be fixed effectively at home.
The key to successful repairs lies in understanding what you’re working with and choosing the appropriate method for each situation. Different materials require different techniques, and the size and location of the damage will influence your repair strategy. From small punctures to larger tears, each type of damage has its own best practices for restoration.
Understanding the Importance of Timely Repairs
Acting quickly when you notice tears or leaks prevents minor damage from becoming major problems. Water damage, in particular, can spread rapidly and affect surrounding materials. A small tear in a pool liner can quickly become a costly replacement if left unaddressed, while a minor leak in outdoor gear can compromise its waterproof integrity entirely.
Early intervention also means simpler repairs. Fresh tears are easier to clean and bond, while older damage may have accumulated dirt, stretched edges, or developed secondary issues that complicate the repair process.
Common Causes of Tears and Leaks
Most tears and leaks result from normal wear and tear, but understanding common causes helps prevent future damage. Sharp objects, excessive stretching, UV exposure, and temperature fluctuations all contribute to material breakdown. Pool equipment can cause liner tears, while outdoor gear often suffers from abrasion against rocks or branches.
Chemical exposure also plays a role, particularly with pool chemicals that can weaken vinyl over time. Age naturally makes materials more brittle and prone to cracking, especially in areas that experience regular flexing or stress.
Tools and Materials Needed for Repairs
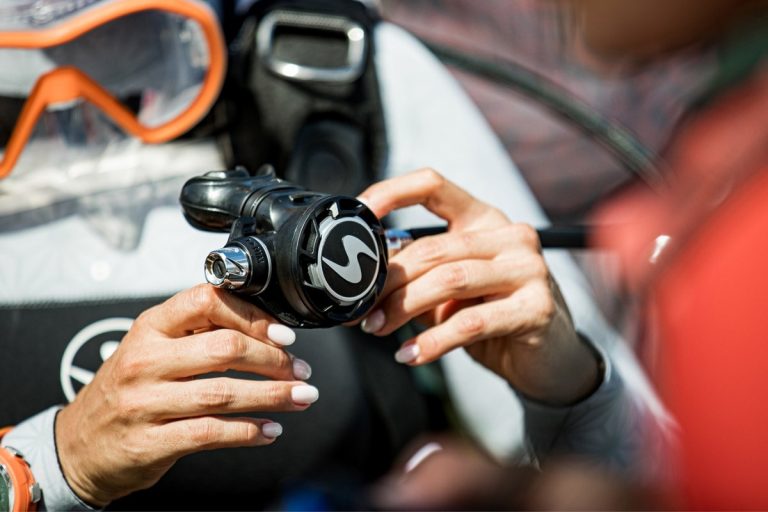
Having the right tools makes repairs more effective and professional-looking. Basic repair kits should include appropriate adhesives, patches, cleaning supplies, and application tools. For pool repairs, underwater patch kits and vinyl cement are essential, while neoprene gear requires specialized adhesives designed for flexible materials.
Quality tools like sharp scissors, clean rags, and proper mixing tools ensure clean, lasting repairs. Investing in good materials upfront prevents repeat failures and saves money in the long run.
Identifying Tears and Leaks
Proper identification is crucial for effective repairs. Not all damage is immediately visible, and understanding how to systematically inspect for problems ensures you catch issues early. Different types of damage require different detection methods, from simple visual inspection to more sophisticated testing techniques.
The location and type of damage will determine your repair approach. Surface tears are straightforward, but hidden leaks or internal damage require more detective work. Learning to read the signs of different types of damage helps you choose the most appropriate repair method.
Visual Inspection Techniques
Start with good lighting and a systematic approach. For pool liners, inspect during daylight hours when the water is calm. Look for obvious tears, but also check for discoloration, bubbling, or areas where the liner appears loose or stretched. These can indicate underlying damage or weak spots prone to future problems.
For gear and equipment, examine high-stress areas first, including seams, corners, and areas that experience regular flexing. Use your hands to feel for rough spots or areas where the material feels different, as these often indicate developing problems.
Signs of Damage to Look For
Beyond obvious tears, watch for subtle indicators of damage. Water level drops in pools, even small ones, often signal leaks. Wet spots around pool equipment or unusual water bills can also indicate hidden leaks. For gear, look for areas where waterproofing seems compromised or where the material appears thinner or more translucent.
Color changes, particularly darkening or fading in specific areas, often indicate UV damage or chemical exposure that weakens the material. These areas are more prone to tearing and should be monitored closely.
Using Dye Tests for Leak Detection
Dye testing is particularly effective for pool leak detection but can also work for other water-related repairs. Add food coloring or specialized leak detection dye near suspected problem areas and watch for movement patterns. The dye will be drawn toward leaks, clearly indicating their location.
This technique works best in still water, so turn off pumps and allow the water to settle before testing. Multiple small tests in different areas can help pinpoint exact leak locations, making repairs more targeted and effective.
Repairing Tears in Materials
Material repairs require understanding the specific properties of what you’re fixing. Neoprene, vinyl, fabric, and other materials each have unique characteristics that influence repair techniques. The flexibility, thickness, and intended use of the material all affect how you approach the repair and what products you choose.
Proper preparation is essential for lasting repairs. Clean surfaces, appropriate adhesives, and correct application techniques make the difference between a temporary fix and a permanent solution. Taking time to do the repair correctly the first time saves effort and materials later.
Types of Material Repairs
Different materials require different approaches. Vinyl repairs often use heat welding or specialized vinyl cement, while fabric repairs might need sewing combined with waterproof patches. Neoprene requires flexible adhesives that maintain the material’s stretch properties, and understanding neoprene care fundamentals helps ensure repairs last.
The repair method also depends on the tear’s location and size. Small punctures can often be repaired with simple patches, while larger tears may require more complex techniques including reinforcement patches or professional-grade materials.
Step-by-Step Guide to Repairing Neoprene Tears
Begin by cleaning the damaged area thoroughly with appropriate solvents to remove oils, salt, and debris. Cut a patch from similar material, making it at least one inch larger than the tear on all sides. Round the patch corners to prevent peeling and ensure the patch material matches the thickness of the original.
Apply neoprene cement to both surfaces according to manufacturer instructions, typically allowing it to become tacky before joining. Press firmly and evenly, working out air bubbles from the center outward. Allow proper curing time before testing the repair, as rushing this step often leads to failure.
Using Adhesives and Patches Effectively
Adhesive selection is critical for repair success. Match the adhesive to both the material and the intended use. Flexible adhesives work best for items that will be stretched or flexed, while rigid adhesives suit items that remain relatively static. Temperature resistance is also important for items exposed to heat or cold.
Patch preparation involves more than just cutting to size. Feathering edges, proper surface preparation, and correct adhesive application all contribute to repair longevity. Multiple thin coats often work better than single thick applications, and following manufacturer cure times prevents premature failure.
Fixing Leaks in Pools
Pool leak repairs range from simple DIY fixes to complex professional jobs. Understanding when you can handle repairs yourself and when to call professionals saves both time and money. Most minor liner tears and fitting leaks can be addressed by homeowners with basic tools and materials.
The key to successful pool leak repair lies in accurate diagnosis and appropriate technique selection. Different leak sources require different approaches, and using the wrong method can make problems worse. Following pool leak repair 101 principles ensures effective, lasting repairs.
Common Pool Leak Sources
Pool leaks typically occur at equipment connections, liner seams, or areas where the liner has been damaged by sharp objects or excessive stretching. Skimmer and return fittings are common leak points, as are areas around steps and ladders where the liner experiences regular stress.
Underground plumbing leaks are more serious and often require professional attention. These can cause structural damage and are difficult to locate without specialized equipment. Surface leaks, while more visible, are generally easier to repair and less likely to cause secondary damage.
DIY Techniques for Pool Leak Repairs
Underwater patch kits work well for small tears and punctures in pool liners. These kits typically include waterproof adhesive and vinyl patches designed to bond underwater. Clean the area thoroughly, apply the adhesive, and press the patch firmly in place, following kit instructions for cure times.
For above-water repairs, drain the pool enough to expose the damaged area. This allows for better cleaning and adhesive bonding. Use vinyl cement and patches specifically designed for pool liners, ensuring the patch extends well beyond the damaged area for maximum effectiveness.
When to Call a Professional
Complex leaks, particularly those involving underground plumbing or structural issues, require professional expertise. If you’ve attempted DIY repairs without success, or if the leak source isn’t clear, professional leak detection services can save time and prevent additional damage.
Large tears, multiple leak points, or damage near critical equipment also warrant professional attention. The cost of professional repair is often less than the expense of failed DIY attempts or the secondary damage that can result from improper repairs.
Maintaining Your Repairs
Proper maintenance extends the life of repairs and prevents future damage. Regular inspection, appropriate cleaning, and protective measures help ensure repairs remain effective over time. Understanding how to care for repaired areas prevents repeat failures and maintains the integrity of your equipment or pool.
Environmental factors affect repair longevity, so adapting maintenance routines to your specific conditions improves results. UV exposure, chemical contact, and temperature fluctuations all influence how repairs age and when they might need attention or replacement.
Best Practices for Longevity of Repairs
Protect repaired areas from excessive stress and environmental damage. For pool repairs, maintain proper chemical balance to prevent premature deterioration of patches and adhesives. For gear repairs, avoid unnecessary flexing of repaired areas until the repair has fully cured and stabilized.
Regular cleaning with appropriate products helps maintain repair integrity. Avoid harsh chemicals or abrasive cleaning methods that could compromise repair materials. Gentle cleaning and proper storage extend repair life significantly.
Routine Inspections and Maintenance Tips
Schedule regular inspections of repaired areas, checking for signs of separation, wear, or new damage. Early detection of repair failure allows for quick intervention before problems spread. Document repair locations and dates to track performance and identify patterns that might indicate underlying issues.
Seasonal maintenance routines should include extra attention to repaired areas. Temperature changes and weather exposure can affect repair materials differently than original materials, so adjusted care routines may be necessary.
Storage Recommendations for Repair Materials
Proper storage of repair materials ensures they’re ready when needed and maintains their effectiveness. Adhesives, in particular, can deteriorate with age or improper storage. Keep materials in cool, dry locations away from direct sunlight and temperature extremes.
Check expiration dates regularly and replace outdated materials. Having fresh, effective repair supplies available encourages prompt attention to problems and improves repair success rates.
Understanding Different Materials
Different materials require different repair approaches, and understanding material properties helps you choose the most effective repair method. Synthetic materials like neoprene, vinyl, and various fabrics each have unique characteristics that influence how they tear, how they can be repaired, and how long repairs will last.
Material selection for repairs isn’t just about matching appearance; it’s about matching performance characteristics. Flexibility, chemical resistance, UV stability, and adhesion properties all play roles in repair success. Learning about neoprene types and eco-friendly alternatives helps you make informed choices for both repairs and future purchases.
Comparing Neoprene and Other Materials
Neoprene offers excellent flexibility and chemical resistance, making it ideal for wetsuits and marine applications. However, it requires specific adhesives and repair techniques that differ from vinyl or fabric repairs. Understanding these differences prevents repair failures and ensures appropriate material selection.
Vinyl is less flexible but often easier to repair, with readily available patch kits and adhesives. Fabric materials may require sewing in addition to patching, depending on the tear location and stress requirements. Each material type has optimal repair conditions and techniques.
Eco-Friendly Alternatives for Repairs
Environmental considerations increasingly influence repair material choices. Water-based adhesives, recycled patch materials, and biodegradable options are becoming more available and effective. These alternatives often perform as well as traditional materials while reducing environmental impact.
Consider the full lifecycle when choosing repair materials. Longer-lasting repairs reduce waste and resource consumption over time, even if initial material costs are higher. Sustainable repair practices align with broader environmental goals while maintaining effectiveness.
Choosing the Right Material for Your Needs
Match repair materials to the specific requirements of your application. High-stress areas need stronger, more flexible materials, while low-stress repairs can use simpler, less expensive options. Consider exposure conditions, expected lifespan, and performance requirements when selecting materials.
Don’t compromise on quality for minor cost savings. Failed repairs often cost more in the long run than using appropriate materials initially. Invest in quality repair materials that match or exceed the performance of the original material.
Advanced Repair Techniques
Complex repairs may require advanced techniques and professional-grade materials. Understanding when simple repairs aren’t sufficient and knowing about advanced options helps you make informed decisions about repair approaches. Some situations benefit from professional techniques even when DIY repairs are possible.
Advanced techniques often involve specialized tools or materials that aren’t commonly available to consumers. However, understanding these methods helps you communicate effectively with professionals and make informed decisions about when to attempt repairs yourself versus seeking professional help.
Using Professional-Grade Tools
Professional repair tools often provide better results than basic consumer options. Heat guns, specialized clamps, and professional adhesives can make significant differences in repair quality and longevity. Consider investing in quality tools if you frequently perform repairs or work with valuable equipment.
Proper tool use requires understanding and practice. Professional-grade tools often have more precise controls and require more skill to use effectively. Training or practice on less critical items helps develop skills before working on important repairs.
Innovative Repair Methods
New repair technologies continue to develop, offering improved options for challenging repairs. UV-curing adhesives, flexible welding techniques, and advanced patch materials provide solutions for previously difficult repair scenarios. Staying informed about new options expands your repair capabilities.
Some innovative methods require specialized equipment or training but offer superior results for specific applications. Evaluate new techniques based on your specific needs and repair frequency to determine if investment in new methods is worthwhile.
Understanding Repair Limitations
Not all damage can be effectively repaired, and understanding these limitations prevents wasted time and materials. Extensive damage, certain material types, or critical stress areas may require replacement rather than repair. Recognizing these situations early saves effort and ensures safety.
Age and previous repair history also affect repair feasibility. Multiple previous repairs or significantly aged materials may not hold new repairs effectively. Honest assessment of repair prospects helps you make appropriate decisions about repair versus replacement.
Frequently Asked Questions
What types of materials can be repaired according to the article?
The article discusses repairing neoprene, vinyl, fabric, and other materials.
Why is it important to act quickly on repairs?
Acting quickly prevents minor damage from escalating into major problems, making repairs simpler and more effective.
What tools are essential for repairing tears and leaks?
Essential tools include adhesives, patches, cleaning supplies, and specialized application tools.
When should I call a professional for repairs?
You should call a professional for complex leaks, especially those involving underground plumbing or significant structural issues.
How can I maintain my repairs for longevity?
Regular inspections, appropriate cleaning, protective measures, and proper storage of repair materials help extend the life of repairs.
Mastering the Art of Repairs
Understanding the intricacies of repairing tears and leaks can empower individuals to extend the life of their equipment and save money. By following best practices and being proactive in maintenance, anyone can tackle repairs confidently, ensuring durability and efficiency in their belongings.