Water photography presents unique challenges that demand a solid understanding of how depth and environmental conditions affect your camera settings. Whether you’re capturing the serene flow of a mountain stream or the dramatic cascade of a powerful waterfall, getting your settings right can make the difference between a mediocre shot and a stunning masterpiece.
The key lies in understanding how water behaves at different depths and speeds, then adjusting your camera accordingly. From the technical aspects of shutter speed and aperture to the creative choices that define your artistic vision, each setting plays a crucial role in the final image.
- Understanding Depth and Water Conditions
- Essential Camera Settings for Underwater Photography
- Techniques for Capturing Water Dynamics
- Choosing the Right Equipment
- Post-Processing Techniques for Underwater Images
- Understanding Motion in Water
- Common Mistakes in Underwater Photography
- Future Trends in Underwater Photography Equipment
- Frequently Asked Questions
- Navigating the Depths of Underwater Photography
Understanding Depth and Water Conditions
Water photography isn’t just about pointing your camera and shooting. The depth of water, its clarity, and movement patterns all influence how light behaves and what settings will work best for your shot. Understanding these fundamentals will help you make informed decisions about your camera configuration.
The Impact of Depth on Underwater Photography
Depth dramatically affects light penetration and color temperature in your images. As you go deeper, red wavelengths disappear first, followed by orange and yellow, leaving you with predominantly blue and green tones. At shallow depths of 3-10 feet, you’ll retain most natural colors, but you’ll need to compensate for the blue-green cast that water naturally creates.
The amount of available light decreases exponentially with depth. What seems like adequate lighting at 5 feet becomes significantly dimmer at 15 feet. This means you’ll need to adjust your ISO settings more aggressively as you go deeper, or rely more heavily on artificial lighting to maintain proper exposure.
How Water Conditions Affect Camera Settings
Water clarity plays a massive role in determining your optimal camera settings. In crystal-clear tropical waters, you can use lower ISO settings and maintain sharp focus at greater distances. However, in murky freshwater environments, you’ll need to increase ISO and potentially adjust your white balance to compensate for the reduced visibility and color distortion.
Particle density in the water affects your depth of field choices too. In water with suspended particles, using a wider aperture can help separate your subject from the background blur, while cleaner water allows for smaller apertures that keep more of the scene in sharp focus.
Choosing the Right Depth for Specific Shots
Different photographic subjects work better at specific depths. Macro photography of small subjects often works best in shallow water where natural light is strongest and you have better control over your composition. Wide-angle shots of larger subjects or landscapes can be effective at moderate depths where the blue-green water tone adds to the mood.
Consider the behavior of your subjects when choosing depth. Many fish are more active in specific depth ranges, and understanding these patterns helps you position yourself for the best shots while using appropriate camera settings for that depth.
Essential Camera Settings for Underwater Photography
Getting your fundamental camera settings right forms the foundation of successful water photography. These core settings work together to control exposure, motion, and the overall look of your images.
Shutter Speed: Freezing Motion vs. Creating Effects
Shutter speed becomes your primary creative control when photographing water. Fast shutter speeds of 1/250 second or faster will freeze water droplets and capture sharp details in moving water. This approach works particularly well for action shots where you want to show the power and energy of flowing water.
Slower shutter speeds create entirely different artistic effects. Speeds between 1/2 and 2 seconds produce that silky, cotton-candy appearance that many photographers love. The key is matching your shutter speed to the volume and speed of the water you’re photographing.
Aperture Settings for Depth of Field
Your aperture choice depends on how much of your scene you want in sharp focus. For underwater landscapes where you want everything from foreground to background sharp, use apertures between f/11 and f/16. These smaller apertures provide the deep depth of field needed for expansive underwater scenes.
When focusing on specific subjects, wider apertures like f/2.8 to f/8 help isolate your main subject from busy backgrounds. This technique works particularly well in murky water where you want to minimize distracting elements in the background.
ISO Settings for Different Water Conditions
ISO management becomes critical in water photography due to rapidly changing light conditions. In bright, shallow water, keep your ISO as low as possible, typically between 100-400, to maintain the best image quality and minimize noise.
As conditions become more challenging, with deeper water or overcast skies, you’ll need to push your ISO higher. Modern cameras handle ISO 800-1600 quite well, and this range often provides the flexibility you need for varying underwater conditions without sacrificing too much image quality.
Techniques for Capturing Water Dynamics
Water movement creates endless creative possibilities, but capturing it effectively requires understanding how different techniques affect the final image. The relationship between shutter speed, lighting, and water behavior determines whether your shots convey energy, tranquility, or drama.
Using Slow Shutter Speeds for Artistic Effects
Slow shutter speeds transform moving water into smooth, ethereal streams that convey a sense of calm and timelessness. Speeds between 1/2 and 4 seconds work well for most waterfall situations, though the optimal speed depends on the water’s volume and flow rate.
Smaller waterfalls and gentle streams often look best with longer exposures, while powerful cascades may need shorter exposures to retain some texture and detail. The key is experimenting with different speeds to find what best represents your artistic vision for each scene.
Fast Shutter Speeds for Action Shots
When you want to capture the raw power and energy of moving water, fast shutter speeds are essential. Speeds of 1/250 second or faster freeze individual water droplets and show the chaotic beauty of splashing water.
This technique works particularly well for photographing waves, rapids, or any situation where the water’s movement and energy are key elements of your composition. The frozen motion reveals details that our eyes typically can’t see, creating compelling and dynamic images.
Balancing Shutter Speed and Lighting Conditions
Achieving your desired shutter speed often requires balancing other exposure settings. In bright conditions, you might need neutral density filters to achieve longer exposures without overexposing your image. These filters act like sunglasses for your camera, allowing you to use slower shutter speeds even in bright light.
In low-light situations, you’ll need to open your aperture or increase ISO to maintain faster shutter speeds. Understanding these trade-offs helps you adapt quickly to changing conditions while maintaining the creative effect you’re after.
Choosing the Right Equipment
The right equipment makes a significant difference in water photography success. From protective housings to specialized lenses, each piece of gear serves a specific purpose in helping you achieve your creative vision while protecting your investment.
Types of Underwater Housings
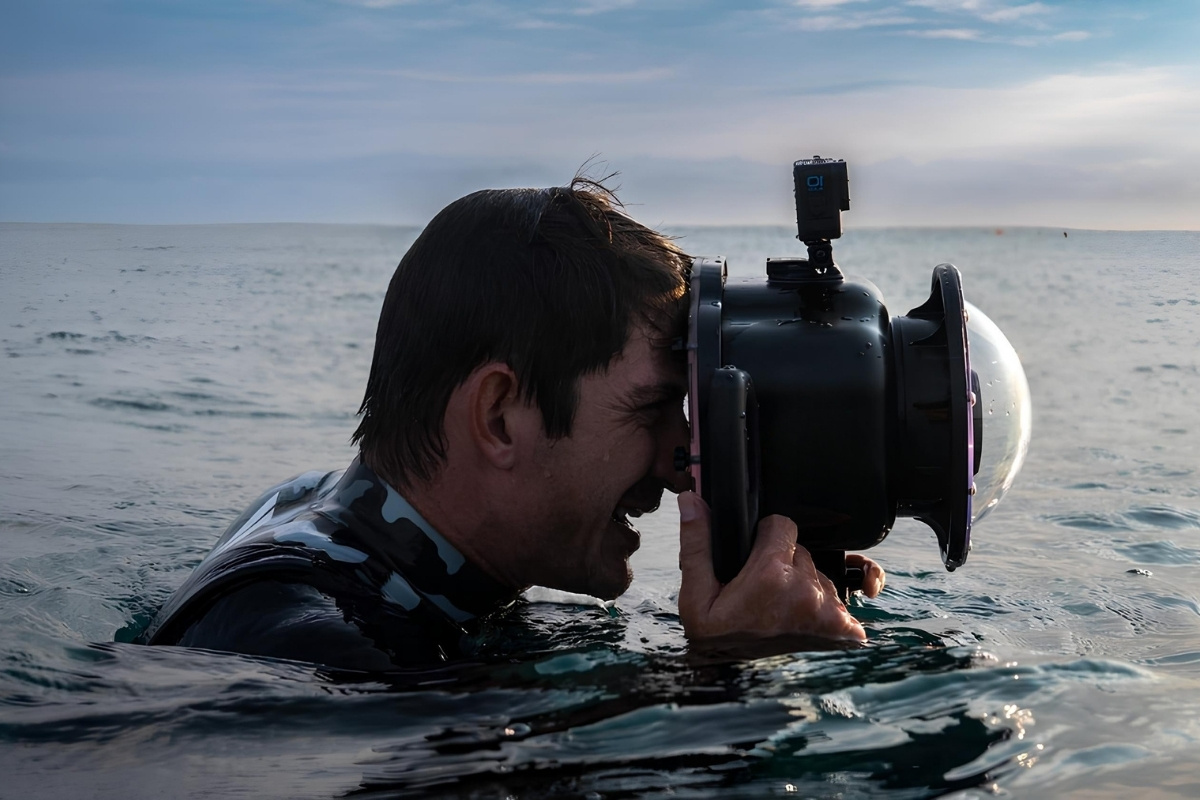
Underwater housings range from basic waterproof cases to sophisticated systems with full camera control. Soft housings work well for casual photography and provide basic protection at shallow depths. Hard housings offer better protection and more precise control but come at a higher cost.
When selecting the appropriate housing for your camera, consider your diving depth, the level of control you need, and your budget. Professional housings allow access to all camera functions and can withstand significant pressure, making them ideal for serious underwater photography.
Recommended Cameras for Different Depths
Camera choice depends heavily on your intended shooting depth and style. Compact cameras work well for recreational diving and snorkeling, offering good image quality in a manageable package. DSLR and mirrorless cameras provide more control and better image quality but require larger, more expensive housings.
For shallow water work, almost any modern camera can produce excellent results. As you go deeper or need more professional results, investing in cameras with better low-light performance and more manual controls becomes increasingly important.
Lenses: Wide-Angle vs. Macro
Lens selection dramatically affects your underwater photography capabilities. Wide-angle lenses capture expansive underwater scenes and work well for showing the relationship between subjects and their environment. They also help minimize the effects of water distortion and allow you to get closer to your subjects.
Macro lenses open up the fascinating world of small underwater subjects. These specialized lenses allow you to capture incredible detail in tiny subjects while providing the working distance needed for underwater photography.
Lighting Options: Strobes vs. Continuous Lights
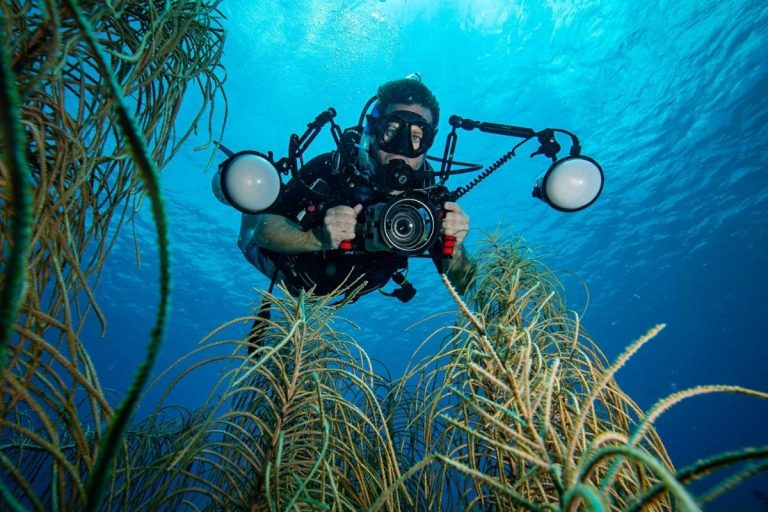
Underwater lighting becomes essential as you go deeper or shoot in challenging conditions. Strobes provide powerful, brief illumination that freezes motion and provides excellent color rendition. They’re particularly effective for macro photography and situations where you need maximum light output.
Continuous lights offer the advantage of seeing exactly how the light affects your subject before taking the shot. They work well for video and situations where you need constant illumination, though they typically provide less total light output than strobes.
Post-Processing Techniques for Underwater Images
Even perfectly shot underwater images benefit from thoughtful post-processing. Water naturally affects color balance and contrast, and editing underwater photos using Lightroom and Photoshop can restore natural colors and enhance the overall impact of your images.
Basic Adjustments for Underwater Photography
Start your underwater image editing with basic exposure and contrast adjustments. Underwater images often appear flat due to the light-scattering properties of water, so adding contrast helps restore depth and dimension to your photos.
Highlight and shadow recovery tools are particularly useful for underwater images. Water can create challenging lighting situations with bright backgrounds and darker subjects, and these tools help balance the exposure throughout your image.
Color Correction Techniques
Color correction forms the heart of underwater image processing. Water absorbs red light first, creating the characteristic blue-green cast in underwater photos. Use the temperature and tint sliders to restore more natural color balance, or embrace the blue tones for a more dramatic underwater look.
Selective color adjustments allow you to fine-tune specific color ranges without affecting the entire image. This technique is particularly useful for enhancing the natural colors of marine life while maintaining the underwater atmosphere.
Enhancing Sharpness and Detail
Underwater images often suffer from reduced sharpness due to water movement and the refractive properties of water. Careful sharpening can restore detail without creating artifacts. Use masking to apply sharpening only to areas that need it, avoiding smooth water surfaces that can show noise when over-sharpened.
Clarity and texture adjustments can help restore the three-dimensional quality that water sometimes diminishes. These tools add local contrast that makes subjects appear more defined and substantial.
Understanding Motion in Water
Different types of water movement require specific approaches to camera settings and technique. Understanding how various water conditions affect your photography helps you adapt quickly and capture the essence of each unique situation.
Capturing Waterfalls: Techniques and Settings
Waterfall photography offers endless creative possibilities through shutter speed manipulation. The perceived ‘most realistic’ shutter speed is around 1/60 second, but this varies based on the scene and your personal style. Larger, more powerful waterfalls often require faster shutter speeds to retain detail and show their impressive force.
Lighting plays a crucial role in waterfall photography. Even illumination across the scene provides the best results, allowing you to capture detail in both the bright water and darker surrounding rocks. Overcast conditions often provide ideal lighting for waterfall photography.
Photographing Rivers and Streams
Rivers and streams present different challenges than waterfalls due to their horizontal flow and varying speeds. Fast-moving sections might need shutter speeds of 1/125 second or faster to show individual ripples and waves, while slower sections can benefit from longer exposures that smooth the water surface.
Consider the volume and speed of water when determining appropriate shutter speeds. Small streams with gentle flow can handle very long exposures, while rushing rivers need faster speeds to maintain some texture and avoid completely washing out the water details.
Adjusting to Different Water Volumes and Speeds
Water volume significantly affects your camera settings choices. High-volume water sources create more dramatic effects with shorter exposures, while low-volume sources might need longer exposures to create smooth, flowing effects.
The relationship between water speed and shutter speed isn’t linear. Sometimes a moderately fast shutter speed creates more interesting textures than either very fast or very slow speeds. Experimentation with different settings helps you find the sweet spot for each unique situation.
Common Mistakes in Underwater Photography
Learning from common mistakes helps accelerate your progress in water photography. These frequent errors can significantly impact your results, but they’re easily avoided once you understand what to watch for.
Ignoring Lighting Conditions
Many photographers focus so intently on their subjects that they ignore how lighting affects their images. Harsh, direct sunlight creates strong contrasts that can be difficult to manage underwater, while overcast conditions often provide more even, workable light.
The direction of light also matters significantly. Side lighting can create dramatic effects and help separate subjects from backgrounds, while front lighting provides even illumination but can appear flat. Understanding how light behaves underwater helps you position yourself for the best results.
Overlooking Camera Settings
Getting caught up in the excitement of underwater photography can lead to neglecting basic camera settings. Regularly checking your ISO, white balance, and exposure settings prevents missed opportunities and ensures consistent results throughout your dive.
Many photographers also forget to adjust their settings as conditions change. What works in shallow, bright water won’t work in deeper, dimmer conditions. Staying aware of changing conditions and adjusting accordingly is crucial for consistent results.
Choosing the Wrong Depth for Shots
Depth selection affects every aspect of your underwater photography, from available light to subject behavior. Shooting too deep for your available light results in noisy, underexposed images, while staying too shallow might limit your subject options.
Understanding the relationship between depth, light, and your equipment capabilities helps you make better decisions about where to position yourself for each shot. Sometimes moving just a few feet shallower or deeper can dramatically improve your results.
Future Trends in Underwater Photography Equipment
The underwater photography world continues to evolve with new technologies and innovations. Understanding these trends helps you make informed equipment decisions and stay current with developing techniques.
Innovations in Camera Technology
Modern cameras continue to improve their low-light performance, which directly benefits underwater photographers. Better high-ISO performance means you can shoot in deeper water or lower light conditions while maintaining acceptable image quality.
The top compact cameras for divers in 2025 feature improved image stabilization, better underwater-specific shooting modes, and enhanced connectivity for sharing images immediately after diving. These advances make underwater photography more accessible to recreational divers.
Advancements in Underwater Lighting
LED technology continues to improve, providing more powerful and efficient underwater lighting options. Modern LED panels offer excellent color rendition and can be used for both still photography and video, providing versatility for underwater content creators.
Battery technology improvements mean longer shooting sessions and more reliable performance underwater. Some new lighting systems offer smartphone connectivity for remote control and settings adjustment.
Emerging Trends in Underwater Housings
Housing manufacturers are incorporating new materials and designs that provide better ergonomics and improved durability. Some housings now feature integrated lighting systems and improved control layouts that make underwater operation more intuitive.
Modular housing systems allow photographers to customize their setup for specific shooting situations, providing flexibility without requiring multiple complete housing systems. This approach makes professional-level underwater photography more accessible and cost-effective.
Frequently Asked Questions
What camera settings are crucial for underwater photography?
Key settings include shutter speed for capturing motion, aperture for depth of field, and ISO for light sensitivity, which should be adjusted based on depth and water clarity.
How does water depth affect photography?
As depth increases, light penetration decreases, affecting color and exposure. Red wavelengths vanish first, leading to predominant blue and green tones.
What are common mistakes in underwater photography?
Common errors include ignoring lighting conditions, overlooking camera settings, and choosing inappropriate shooting depths.
What equipment is recommended for underwater photography?
Recommended equipment includes appropriate underwater housings, cameras suited for the intended depth, and lenses designed for specific types of shots.
How can post-processing improve underwater images?
Post-processing can enhance color balance, sharpness, and contrast, restoring the natural look of underwater images affected by water’s light-scattering properties.
Navigating the Depths of Underwater Photography
Mastering underwater photography requires a combination of technical knowledge and creative vision. By understanding the impact of depth and water conditions on camera settings, photographers can capture stunning images that convey the beauty and complexity of aquatic environments. Continuous learning and adaptation to new technologies will further enhance the ability to explore and document this captivating realm.
